If you’re a freelancer, self-employed, or sole trader, your clients pay you for every work you do. And you can get the payment through invoicing. An invoice maker for freelancers and self-employed is the best tool to get paid without hassle.
| Here are some important terms to remember: |
| Quotation – a quotation shows the estimated cost of a job request or service should a client proceed with it. Clients typically ask for a quotation before getting a particular job or service done. Invoice – an invoice is a statement that indicates the sum of the total cost of the goods or services provided. It explains what work has been done or shows the list of items or products that were bought. Receipt – a vendor issues a receipt to a customer or client once payment for the goods or services has been paid. Sometimes an invoice is unnecessary when the client pays the goods or services one time in full amount. |
How to Use An Invoice Maker for Freelancers and Self-Employed?
The ultimate goal of an invoice maker is to make invoicing fast and easy. So when you download an invoice maker app, it generates an invoice instantly, with fields you need to fill out with information.
Spark Invoice Generator is an intuitive invoice maker for freelancers and self-employed. One tap and it creates a simple yet professional-looking invoice.
Here’s how to use it:
On the homepage, click the + New in the Invoices bar.
Then, fill out the rest of the fields:
Invoice Number
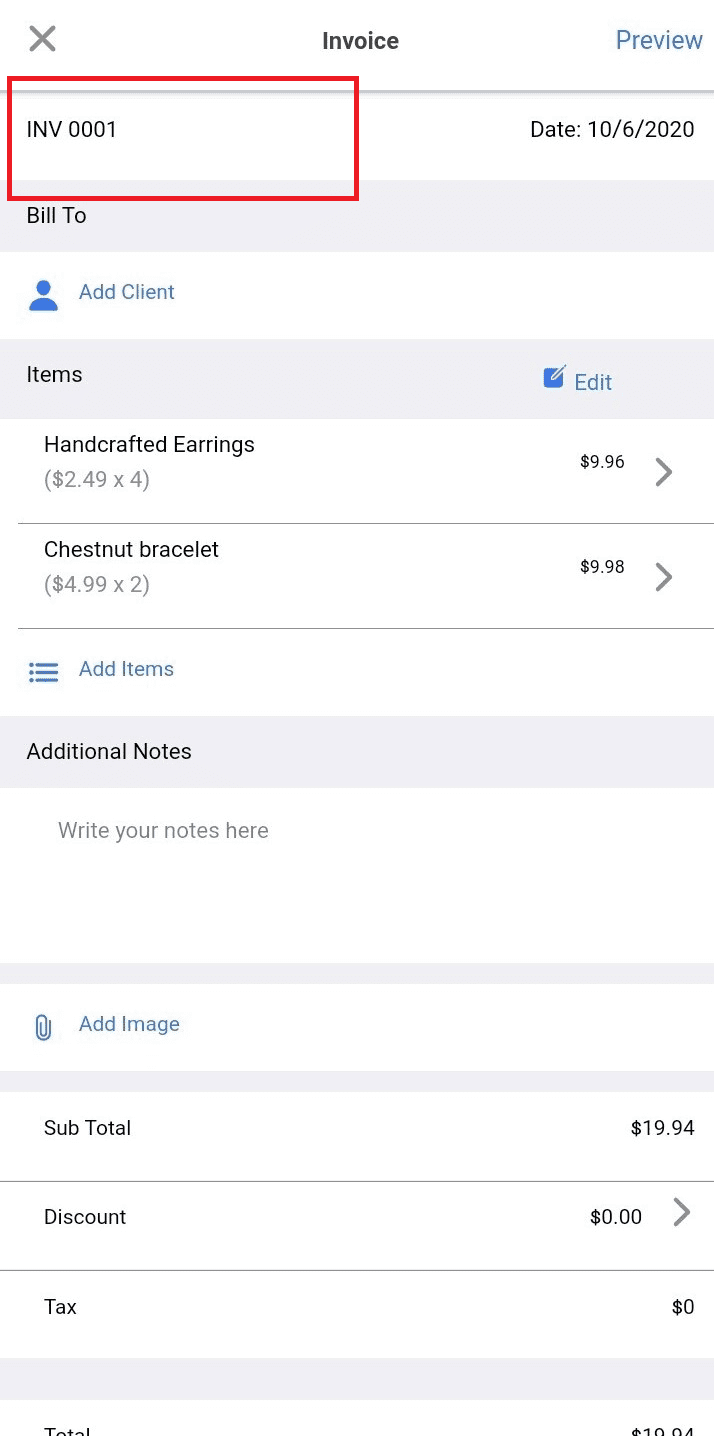
Spark Invoice App automatically generates an invoice number whenever you create a new invoice. You can leave it as it is or change it. The invoice number starts with a prefix, and by default, it is Invoice, followed by the number.
The invoice number helps you track your invoices easily. When a client fails to pay your invoice within the specified time, you can make a follow-up and use the invoice number as a reference.
Always remember not to use the same invoice number even when billing different clients.
Worry not, though. Spark Invoice Maker automatically detects similar invoice numbers to prevent you from duplicating them.
To change the invoice number prefix, go back to the Homepage > Settings > Invoice Prefix.
To learn more about how to use the invoice number, check out our guide Can You Customize Your Invoice Number With An Invoice App?
Date
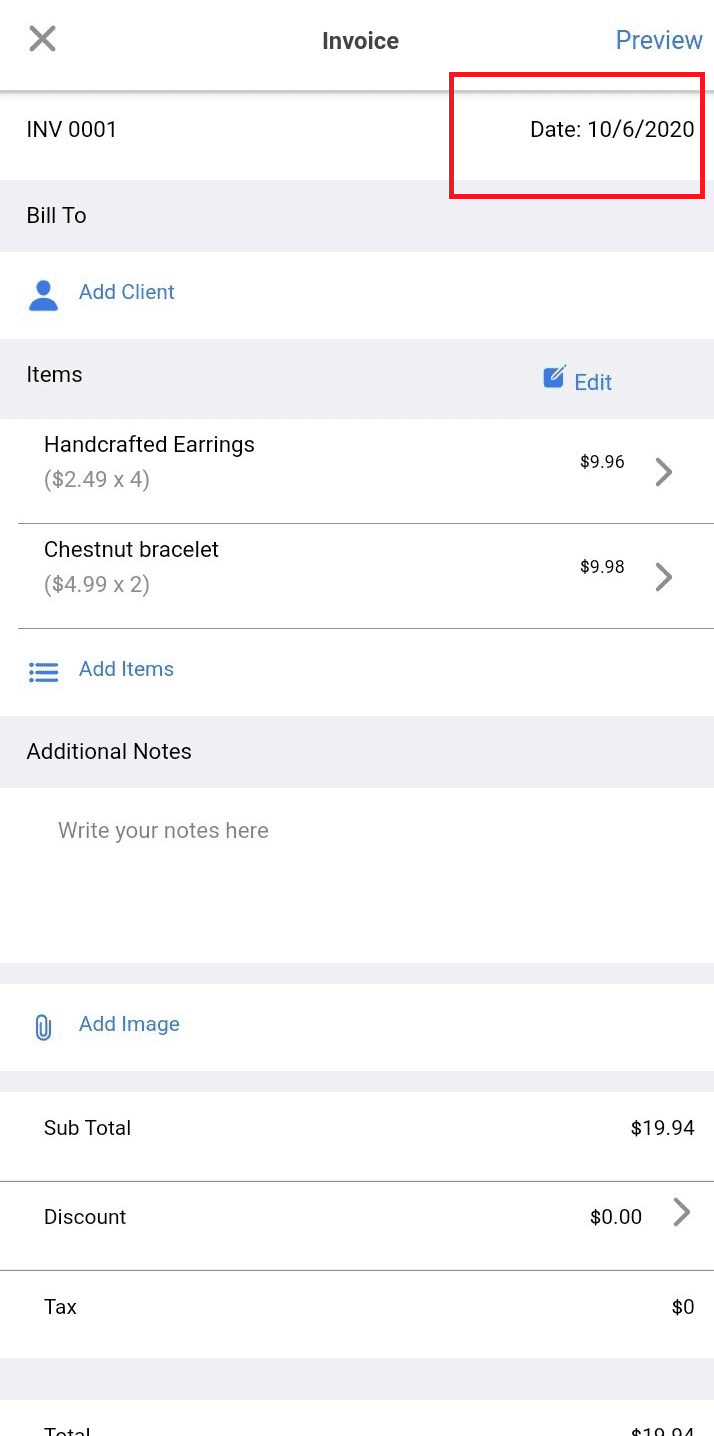
Input the date you issue the invoice.
Adding the date is very important as it not only helps you distinguish one invoice from another, but it will also help you keep track of the payment timeline.
Furthermore, the date helps determine how long clients take before making payments and charge late fees or interests, depending on the terms you and your client agreed on.
By default, the date format is day/month/year.
You can change the date format in Settings > Date Format > then select from the drop-down menu. The other option is month/day/year.
Client Information

Spark Invoice Maker lets you add client information manually or by importing the data from your contacts.
When adding a client manually, you need to fill in these details:
- Name (Business name or client’s name)
- Phone number
- Address
- City
- Postal code
- Country
Add a client from your contact list. Hit Add Client > Import from Contacts > then choose from your list. Then, fill out the rest of the fields.
Billing a repeat client? You don’t have to input the same information. Select Add Client > Add from Saved Clients.
Line Item Description
Invoice maker for freelancers and self-employed should be simple and straightforward—and that’s exactly what Spark Invoice Maker is all about.
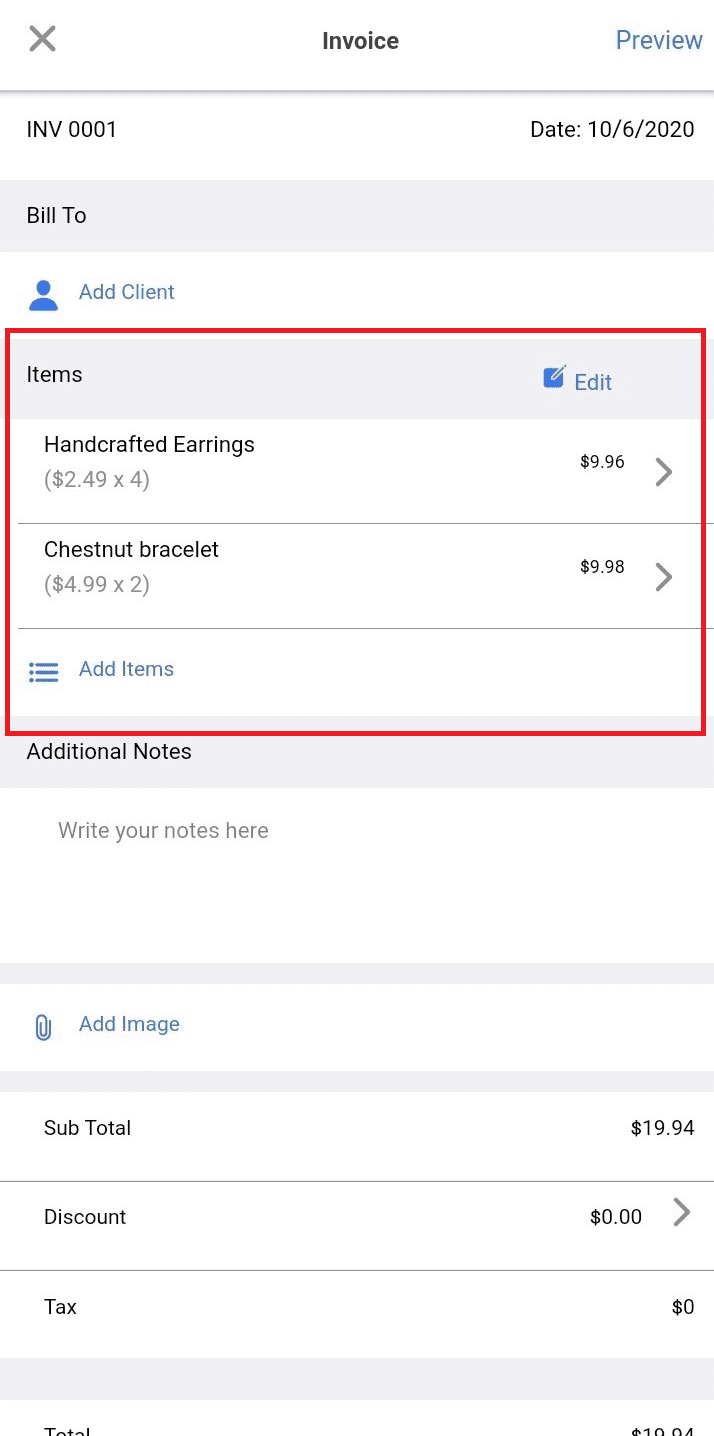
After adding the invoice number, date, and client information, it’s time to breakdown the goods or services you have provided. List each item separately.
Tap Add Items > Add New Item, then complete the fields. Input the item name, then add a description. If you have provided a service, the description bar lets you describe the milestones or progresses you have completed.
Next, input the quantity and the unit price or rate of that product.
All the items you list down are saved automatically. So when you have to input the same item, you can quickly select them by selecting Add from Saved Items.
Additional Notes
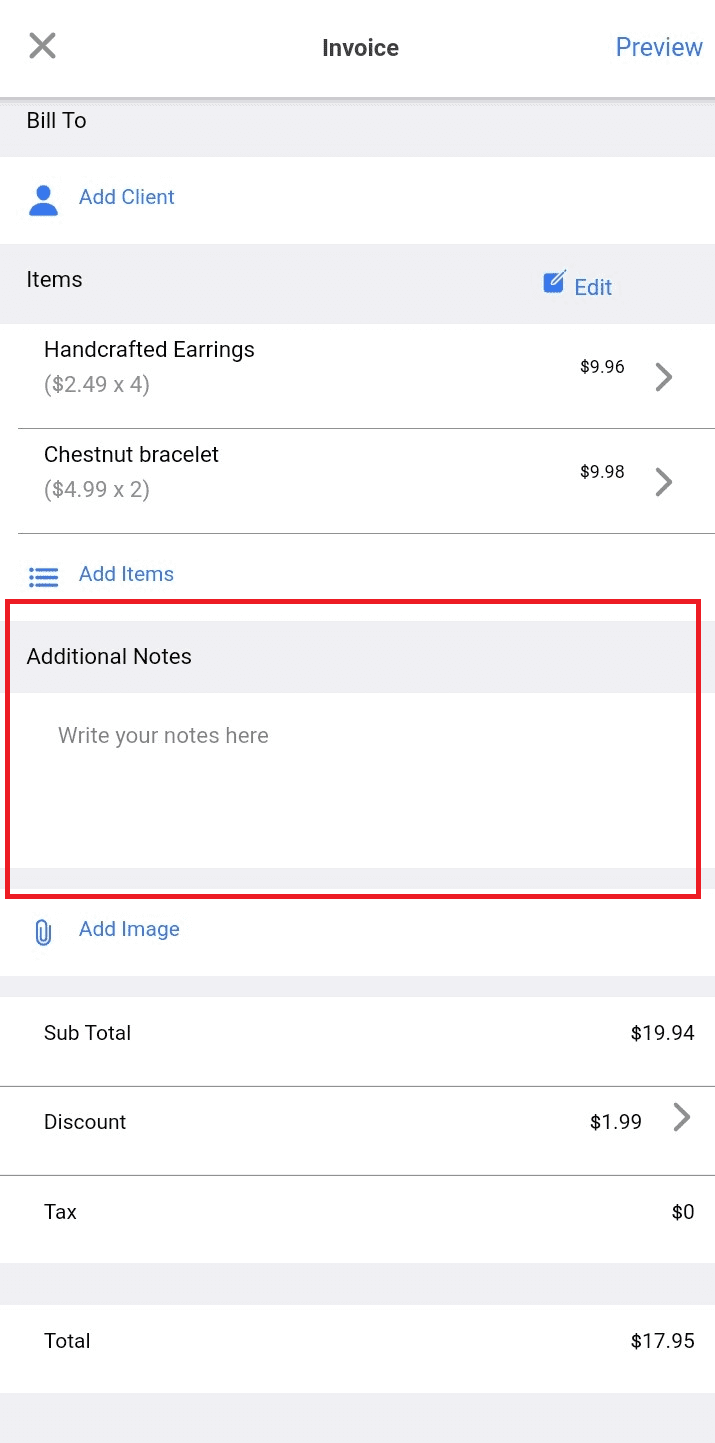
The Additional Notes field is perfect for adding information that clients need to know about the services, projects, products, or the invoice. It’s also ideal for sending clients a simple thank you message for patronizing your products or services.
Add Image
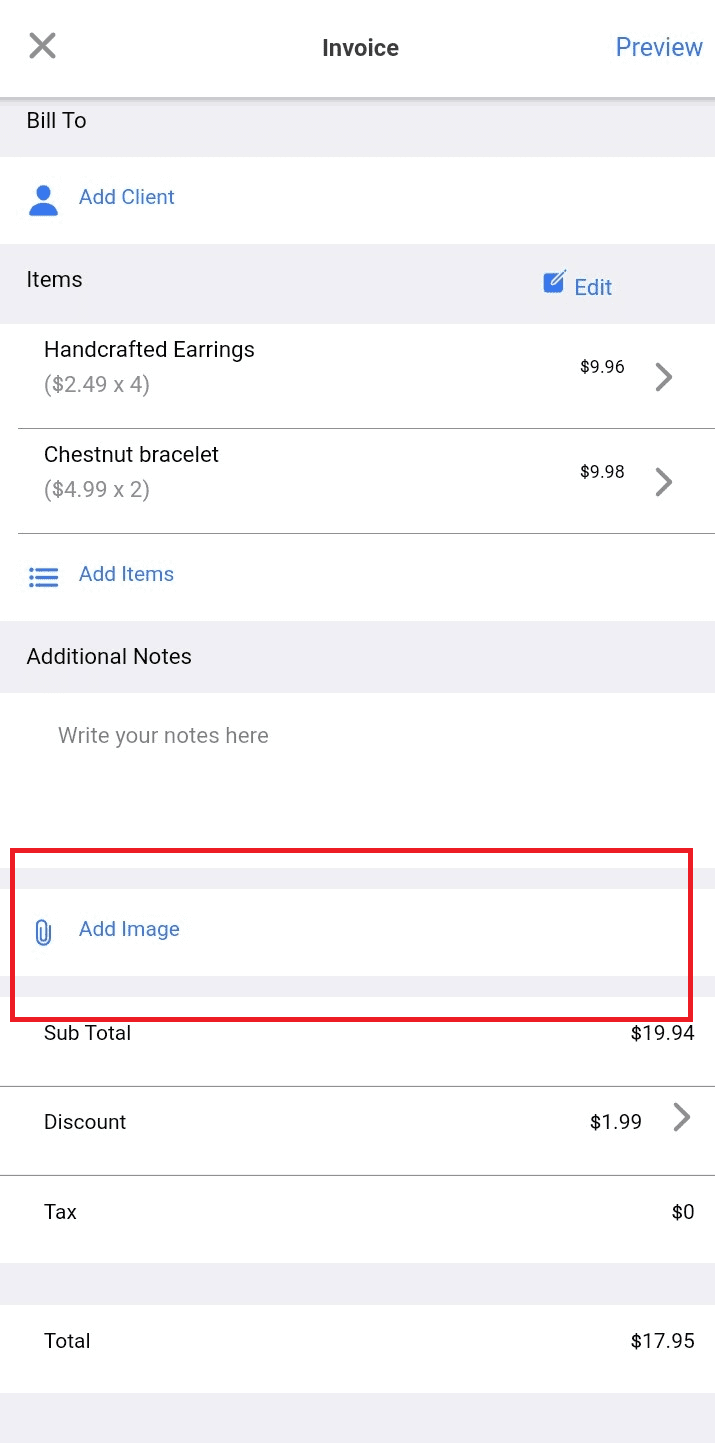
Do you need to attach an image along with your invoice? Spark Invoice Maker lets you add an image as easy as one tap. When adding images, you can choose whether to get a photo from your gallery or take a new picture with your camera.
The add image feature comes handy when you need to show your clients proof of shipment, project completion, or the products you provided.
Subtotal
Spark Invoice Maker automatically calculates the total amount of all the listed items, excluding discounts and tax. This means you don’t have to worry about doing the math yourself or getting miscalculations.
Discounts
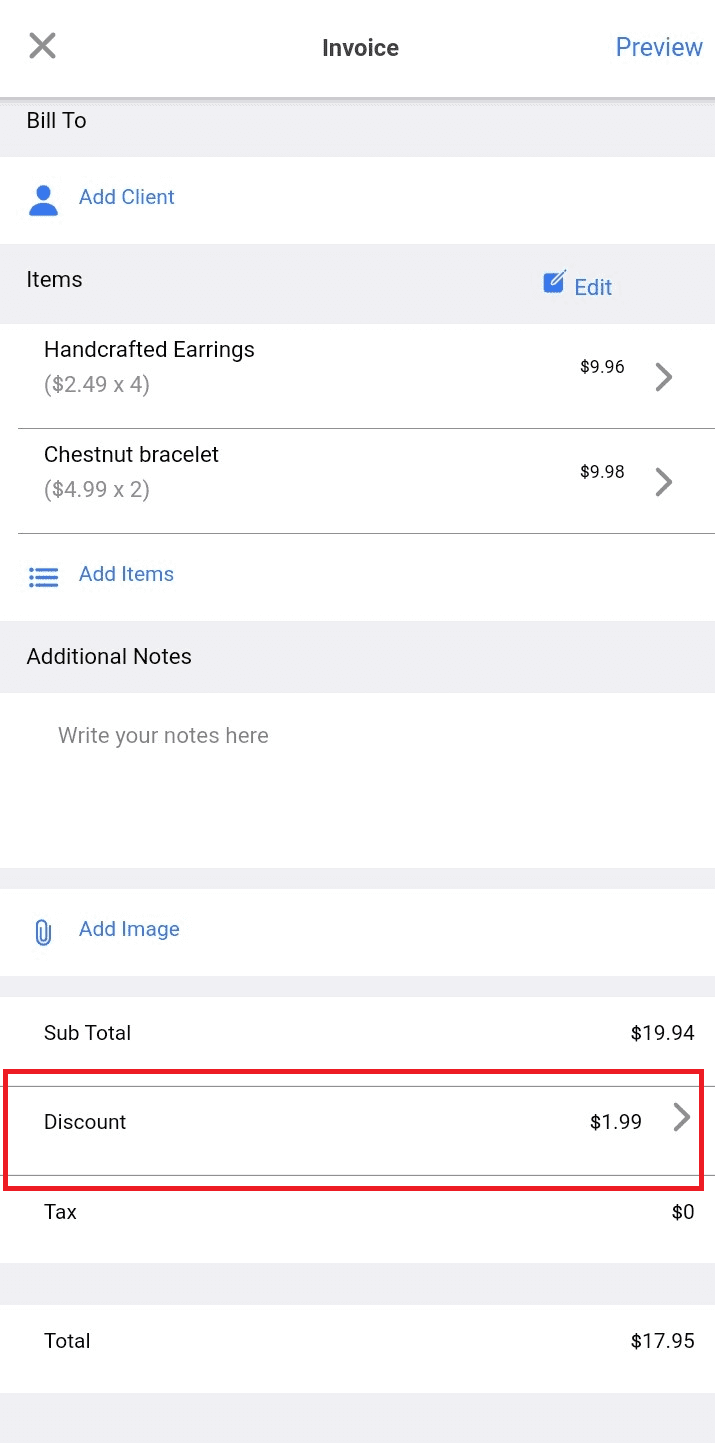
Adding discounts is easy with Spark Invoice Maker. Tap the Discount option located below Sub Total, then choose between fixed or percentage discount. The discount will be automatically deducted from the total amount.
Tax

By default, the tax rate setting is set to Items prices are tax-inclusive, meaning each item’s unit price already includes tax.
To change the tax rate, go to Settings > Tap the tax type, and select Items prices are tax exclusive. Then, add the tax amount in percentage.
Total Amount
The total amount shows the gross amount that your client needs to pay.
Tips When Using Invoice Maker for Freelancers and Self-Employed
Don’t forget to add your business information
Using Spark Invoice Maker, go to Settings > Business Info.
Add the following details:
- Business name (it could be your name or business name)
- Phone number
- Address (Street, Country, Postal Code)
Make sure to add your contact information so clients can quickly contact you if they have questions regarding your invoice.
Make it your own
Add a business logo to make your invoice unique from others. Your business logo also makes it easy for clients to recognize your invoice. To add or change your business logo, go to Settings > Business Logo.
You can either upload your logo or take a photo from the app.
Choose the right currency
Spark is the perfect invoice maker for freelancers and self-employed, regardless of where they live. Change the currency with ease. Spark Invoice Maker supports currencies from ₳ to ¥.
Don’t be afraid to follow up
As a freelancer and self-employed, you must have regular communication with your clients. Add your contact information in the invoice so your clients can quickly contact you about any questions they have regarding your payment.
Send your invoice with a friendly email note. Make sure to thank your clients! If a client fails to pay on time, there’s no need to go berserk. Instead, send a friendly reminder.
Describe the work you completed
Your client likely deals with multiple freelancers, so make sure to describe the work you’re providing to your client to avoid misunderstandings or mix-ups. The Additional Notes in Spark Invoice Maker lets you add project descriptions.
When your client knows the projects or services you have provided, you are more likely to get paid faster.

